
Top Tips
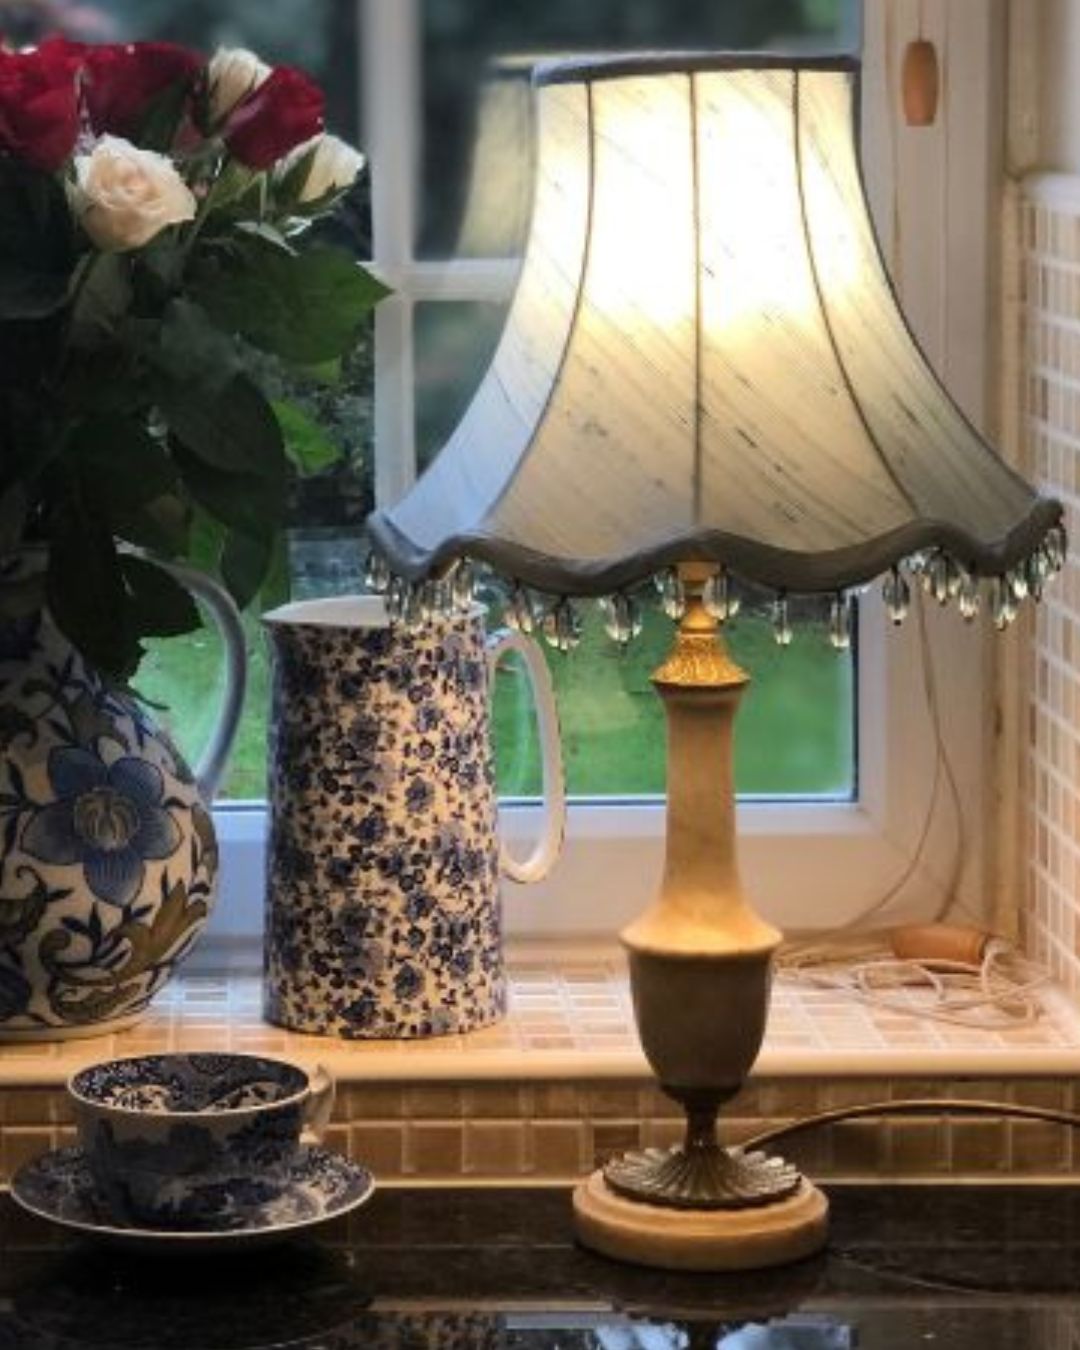
Classic, neat traditional tailored lampshades give a timeless elegance to both formal and relaxed room schemes. Tailored lampshades are suited to all shade frame proportions and a huge variety of fabrics, presenting oodles of design options.
Top Tips
Classic, neat traditional tailored lampshades give a timeless elegance to both formal and relaxed room schemes. Tailored lampshades are suited to all shade frame proportions and a huge variety of fabrics, presenting oodles of design options.
First and foremost this blog is meant as a Top Tips reminder guide for students who have been to one of my workshops. It is not intended as a step-by-step guide to replace a face-to-face workshop. I would need to write a book for that. Having said that for anyone reading I hope it prooves to be informative, whether you have been to a workshop and looking for memory triggers, are interested in coming to one of my workshops or are looking for more information about making bespoke, handmade, tailored lampshades. Enjoy!

What Fabric Should I Use?
There are oodles of fabric choices available today, suited for tailored lampshades. Traditionally silk has been the lampshade makers choice for tailored lampshades, as the closely woven threads and luxurious sheen diffuses light perfectly when stretched. Silk is also light weight and being a natural fibre is durable and naturally heat-resistant.
Bearing this in mind, I encourage you to experiment when making your own DIY tailored lampshade with pattern, colour and texture. Depending on your frame shape and design choice there are a multitude of cottons and linens which are also suitable and even some wools velvets, damask, and/or embroideries which would look amazing on tailored lampshades.

How do I get started?
First you’ll need to bind your frame. Then create a template for your face fabric and balloon lining. The templates may vary depending on the design of your completed Tailored lampshade and how many frame panels you are going to incorporate in the face fabric and/or balloon lining.
Templates for Tailored Lampshades will be a later Blog.
If using a patterned fabric I like to make a tissue paper template copy so that I am able to position exactly how I would like my pattern to fit. Given a little patience and pattern tweaking it is also possible to pattern match panels just as you would do with bespoke curtains and blinds. However if you are trying this at home, most patterned fabrics are very forgiving and this isn’t essential at all for very busy fabric designs and plain fabrics.

Machine sew 1cm along the side seam. Then check the fit to the frame by pulling the face fabric gently over the frame from top to bottom. The Face fabric should feel quite tight. Line up the seams with the vertical struts. Remove the fabric from the frame and depending on the fabric give and fit; sew a second seam 2mm to the inside or outside of the first seam. Then trim the seam evenly to about 3mm.
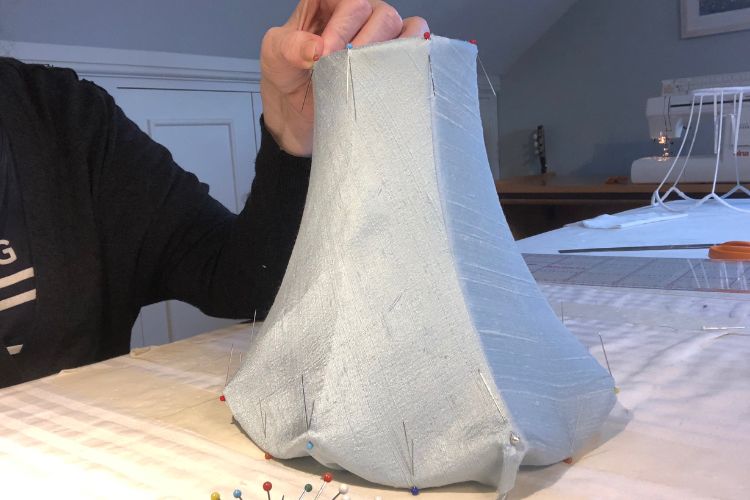
Pull the face fabric gently back over the frame and line the seams against the struts. How many strutts will depend on your design. In this image I have two pieces of face fabric alined to the out most strutt equa distance from the gimbals.
Pin at the top and bottom of each seam making sure that you go right through the India cotton binding tape. Begin pinning around the top ring making sure to pin through the binding. Turn the shade over and gently repeat along the bottom ring. Don’t pull in too much tension at this stage, just ancor the fabric against the frame, seams inline with the strutts.
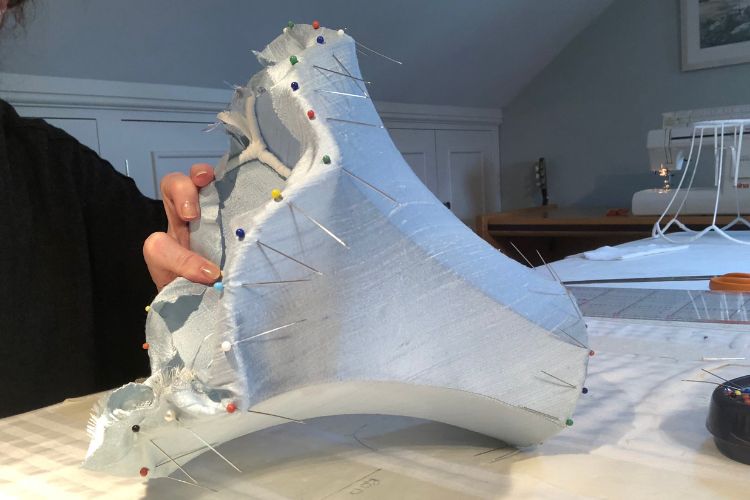
Once everything is in place begin to ease some tautness into the fabric and re-pin.
How do I ensure a smooth finish?
To remove any stubborn wrinkles and to create an evenly taut skin follow the grain of fabric from the wrinkle to the edge, pull till the wrinkle disappears and then pin.Pins, pins and more pins! Spend time tweaking the tension and pinning for equal tension. At this point ripples and unevenness are quite normal when making your tailored lampshade. Turn your frame back and forth, pinning and stretching again and again to gentley and gradually work more tension into the face fabric to create even tautness, and keep pinning!
To remove any stubborn wrinkles and to create an evenly taut skin follow the grain of fabric from the wrinkle to the edge, pull till the wrinkle disappears and then repin.
Keep a close eye on your seams against the strutts. They need to stay inline for a professional, neat finish.
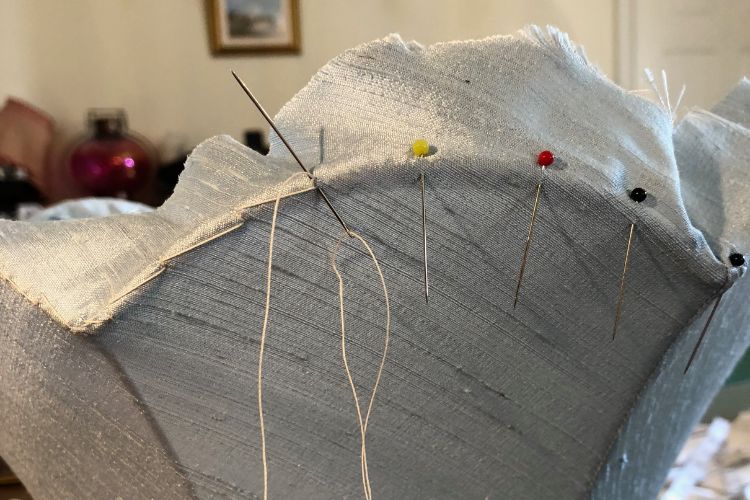
Pull tensions into the side seams. Keep turning the lampshade at 45′ angles and pull the same tensions into the cover across all sections, and keep pinning. Once you are completely happy with the fit use lampshade stitch and a strong matching thread to attach the face fabric to the frame ensuring that your stitches go through all the layers. Correct lampshade stitch is key to maintaining tensions and something we cover in detail at our workshops. Some of these dynamics are covered in our Lampshade Stitch video.
Now your lampshade is reading for ling and possibly trimmings. This is covered on a future blog. Happy lampshade making.
Workshop Dates
Jacqueline runs 2-day, bespoke handmade lampshade workshops at scheduled times throughout the year. You can also join a 1-2-1, 2 or 3 day master class by special arrangment. Do come and join us!